How to Turn a Photo into a Coloring Page
A good coloring page made from your own photo comes down to three things: the photo you choose, the settings you pick and how you print it. Get those right and you end up with a page someone actually wants to color — your dog mid-zoomie, your grandparents on their porch, the two of you on your wedding day. This guide covers each step, how to fix pages that come out wrong, and how to turn a stack of pages into a small coloring book.
We'll use our free photo to coloring page tool for the examples. You don't need an account, pages have no watermark, and you get up to 15 free pages a day. Most of the advice works whatever tool (or pencil) you use.
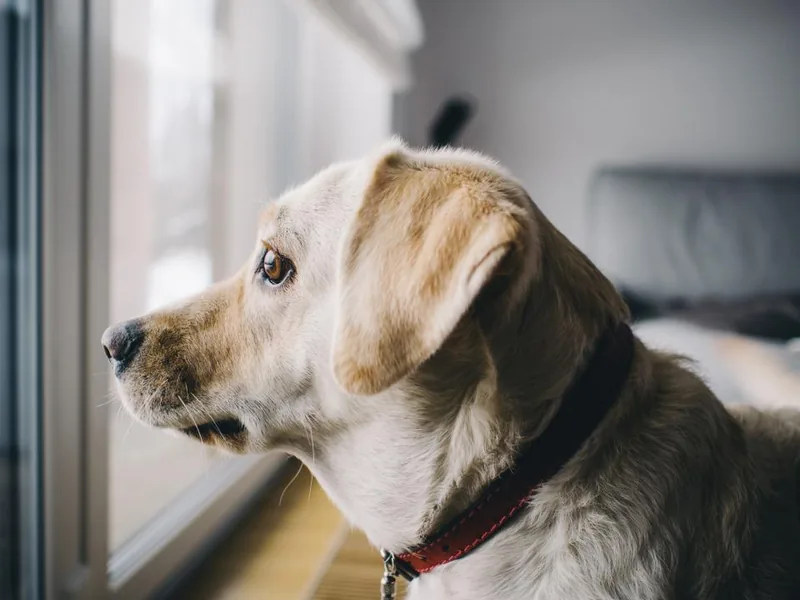
Photo
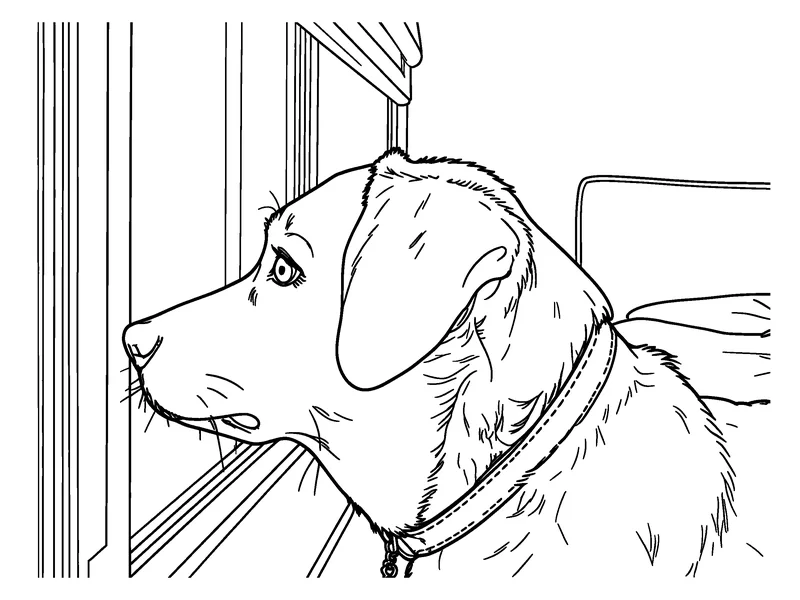
Coloring page (Standard)
What makes a photo work as a coloring page
A coloring page is just black lines on white paper. Anything that can't be drawn as a clean line — soft shadows, blur, similar colors side by side — disappears or turns into noise. The best photos are ones where the important shapes are already obvious.
Light and contrast
Pick a photo taken in even, bright light, such as daylight near a window or a bright overcast day. Harsh midday sun creates deep shadows that can become dark blobs or extra lines across a face. Dim indoor photos are hardest: when subject and background are both dark, the edges between them are hard to find.
Quick test: view the photo in black and white on your phone. If you can still see where the subject ends and the background begins, it will probably convert well.
Get close
The subject should fill most of the frame. A face that takes up a quarter of the picture keeps its eyes, nose and smile. A face that is a tiny dot in a landscape shot will be simplified to a few lines, and it may not look like anyone in particular.
Before you upload, crop. For group photos, crop in so faces are larger, or make one page per person. Cropping costs nothing and is the single biggest improvement you can make.
Keep the background simple
Busy backgrounds — bookshelves, patterned wallpaper, crowds, leafy gardens — compete with your subject for lines. The tool simplifies busy backgrounds so the subject stands out, but a plain or out-of-focus background still helps. If the background is the point (a house, a favorite beach), choose a higher detail level instead.
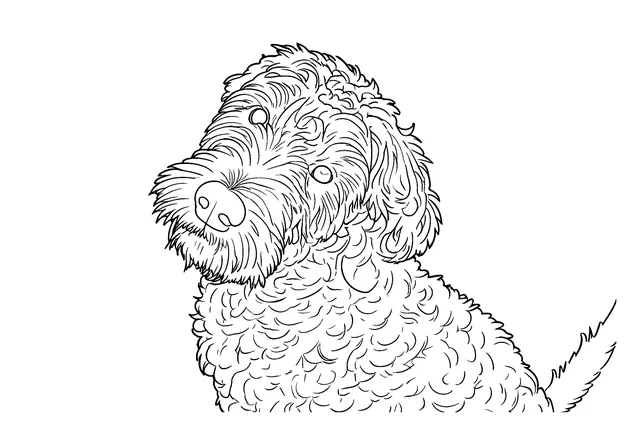
Pets with dark or long fur
Black cats and dark, long-haired dogs are tricky. There is very little contrast inside dark fur, so eyes, ears and the outline of the body can merge together. What helps:
- Choose a photo where the pet is against a lighter background.
- Make sure the eyes catch some light; a photo taken facing a window works well.
- Try more than one detail level. Standard keeps the overall shape; Detailed can keep more fur texture, but can also add clutter. Compare and keep the one you like.
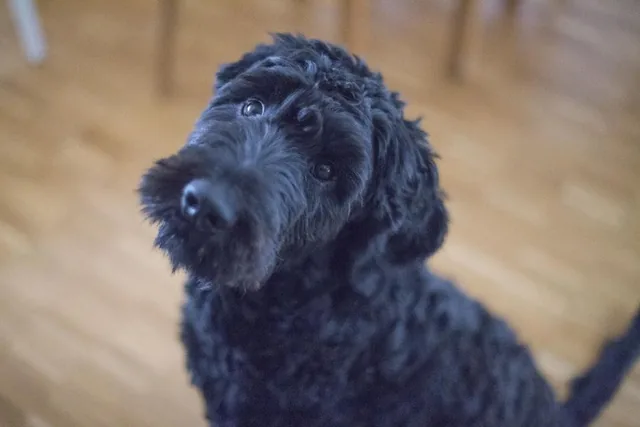
Photo
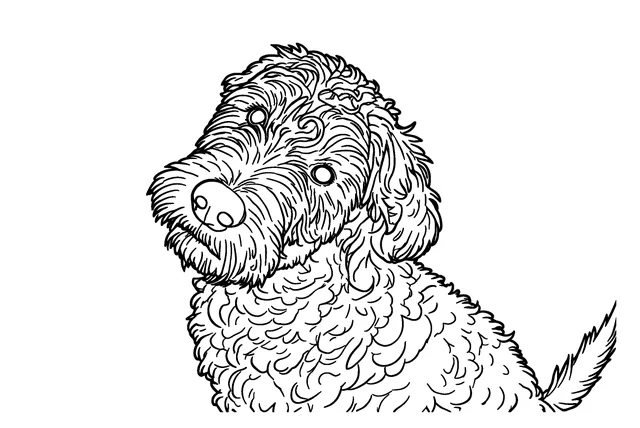
Standard
Detailed
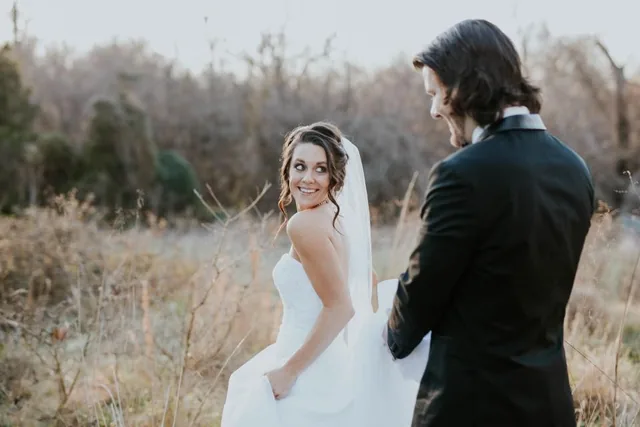
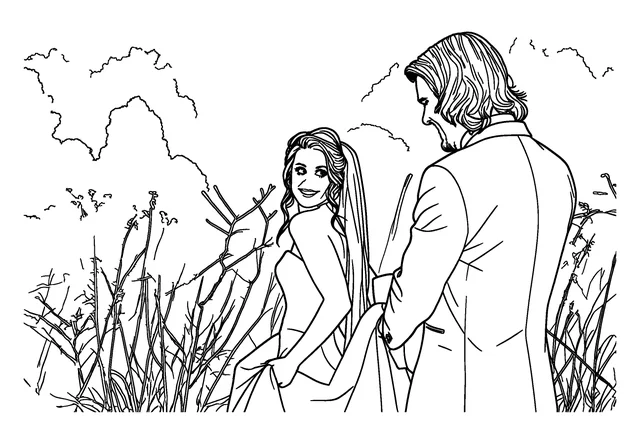
Wedding photos, white dresses and veils
White on white is the opposite problem: a white dress against a bright sky or a pale wall has almost no edge. Lace and veils add a lot of fine pattern that can either vanish or turn into a mess of tiny lines. For wedding and anniversary photos:
- Choose shots where the couple stands in front of something darker — trees, a doorway, a dark suit next to the dress.
- Avoid heavily backlit photos where the veil glows.
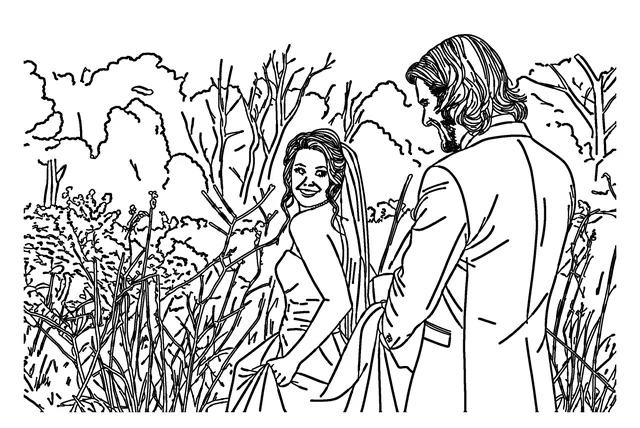
- Use the Bold & detailed level. It is built for exactly this: thick, even lines that try to keep faces, lace and veils.
Photo
Standard
Bold & detailed
File types
JPEG, PNG, WebP and HEIC (the iPhone default) all work. Your browser resizes the photo before upload, which also strips details such as GPS location.
Choosing a detail level
The tool has four detail levels. The same photo gives quite different pages, so it is worth knowing what each one is for.
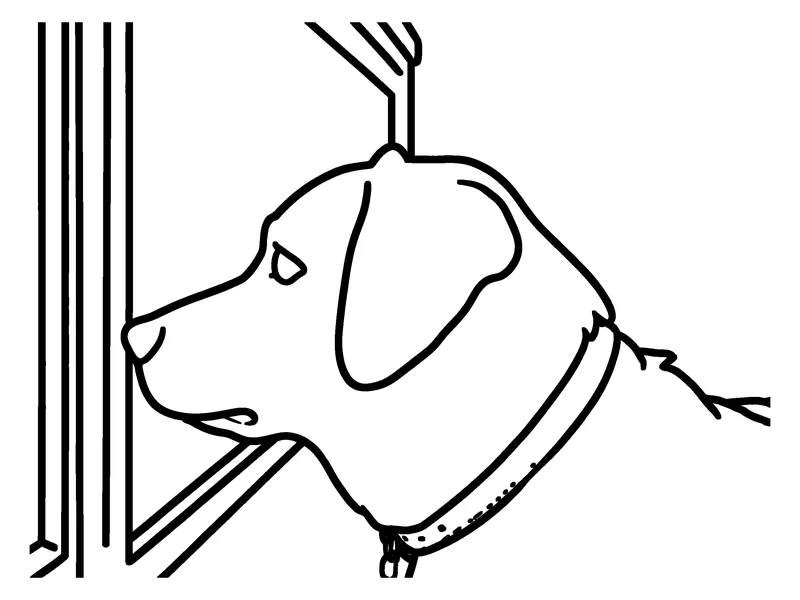
Simple
Standard
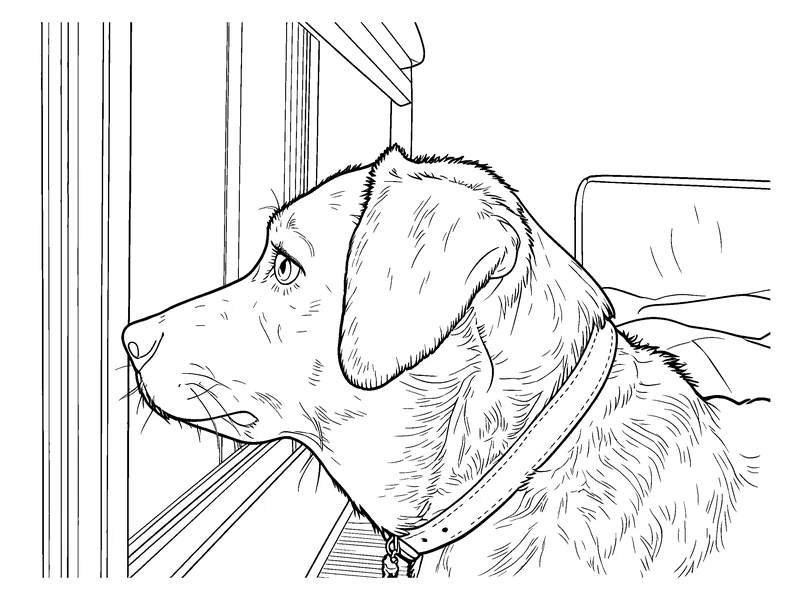
Detailed
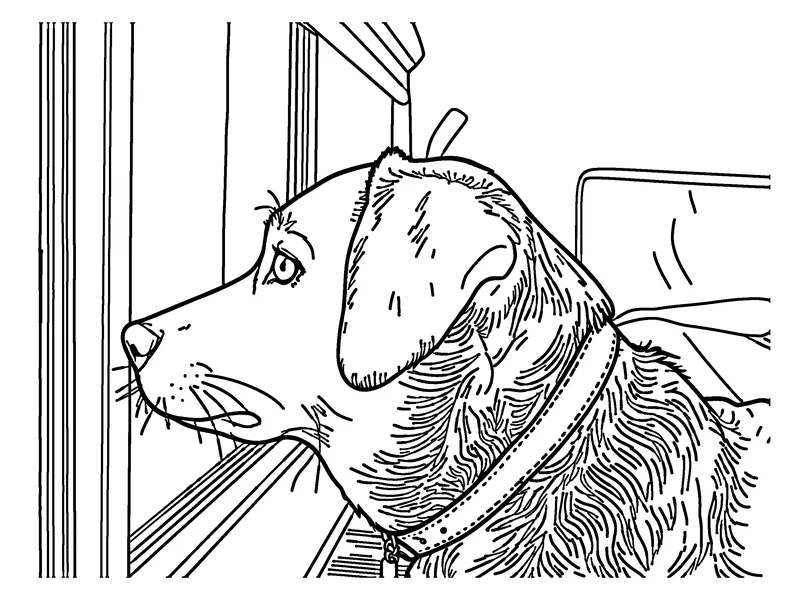
Bold & detailed
- Simple — big shapes for little kids. Fewer lines, larger areas to fill. Best for toddlers and preschoolers, or when a photo is busy and you only want the main outline.
- Standard — balanced detail. The right starting point for most photos and most ages.
- Detailed — for older kids and adults. Keeps more texture, such as hair, fabric folds and background elements. More satisfying for patient colorers, but busier.
- Bold & detailed — thick lines that keep faces and lace. It asks for fewer, cleaner lines, then redraws them with an even, thick pen, using a slightly thinner pen where lines sit close together, such as hair, lace and veils, so those areas stay open for coloring. Good for weddings, portraits and anyone coloring with markers.
Unsure? Start with Standard. If the page looks crowded, go down to Simple; if it looks empty, go up. Each try uses one free page, so testing two levels on a tricky photo is a fair use of your daily allowance.
Step by step: turn any photo into a coloring page
The whole process takes about a minute per page.
- 1
Choose and crop your photo. Use the tips above: good light, subject large in the frame, simple background. Crop on your phone or computer first.
- 2
Upload it. Open the turn any photo into a coloring page tool and drop the photo onto the upload box, or tap to choose one. Your photo stays in your browser until you click Generate.
- 3
Pick a detail level and paper size. Choose Simple, Standard, Detailed or Bold & detailed, then US Letter (8.5 × 11 in) or A4 (210 × 297 mm). The tool guesses the paper size from your browser language; switch it if it guessed wrong. Confirm that you are 18 or older and have the right to use the photo.
- 4
Generate and check the result. Click Generate and wait about a minute. Look at the page as if you were about to color it: are the faces recognizable, are the shapes closed, is the background under control? If not, click Regenerate (it uses one free page) or try a different detail level. If a page fails for a technical reason, the free page it used is returned automatically.
- 5
Download or add to a book. Download a PNG or a PDF sized for your paper. Or click "Add to coloring book" to collect it for a multi-page book.
Five common problems and how to fix them
1. Too many lines. The page looks like a scribble, especially in the background. Crop tighter, switch to Simple, or pick a photo with a plainer background.
2. Lines that don't close. Some shapes leak into each other, which is annoying if you color with paint or a fill tool. Try Bold & detailed, which draws fewer, more even lines. For one or two small gaps, it is often faster to close them with a black pen after printing.
3. The face doesn't look like the person. Faces are drawn, not traced, so small faces lose detail. Use a closer crop, a photo where the face is well lit and facing the camera, or one page per person instead of a group shot. No tool can promise that every face looks exactly like the photo, and ours doesn't either.
4. The subject is lost. A person or pet that is small in the frame ends up as a few lines surrounded by scenery. Crop so the subject fills most of the frame, then regenerate.
5. The print looks blurry or jagged. This usually means a screenshot or phone preview was printed. Print the downloaded PNG or PDF instead.
Printing tips
The files. Every page can be downloaded as a print-ready 300 DPI PNG, black lines on white with no gray shading. In our test, a 4:3 photo came out at 2592 × 1944 pixels. You can also download a PDF sized for US Letter or A4, with half-inch margins so lines stay clear of the edge most printers can't reach. In single-page PDFs, landscape photos go on a sideways page so they print larger.
Letter or A4? Use US Letter in the US and Canada, and A4 almost everywhere else. The wrong size usually still prints, just smaller or with uneven margins, so pick the right one before downloading.
Printer settings.
- Choose "Actual size" or "Fit to page". Avoid custom scaling.
- Print in black or grayscale to save color ink.
- Use your printer's best quality setting if lines look faint.
- Print single-sided so markers don't bleed through onto the next picture.
Paper. Ordinary printer paper is fine for crayons and colored pencils. For markers or paint, use heavier paper or cardstock that your printer can feed.
Making a multi-page coloring book
A whole book of your family, your pets or a special year makes a lovely gift. Our photo coloring book builder puts everything into one printable PDF.
- 1
Add photos. Upload several photos on the coloring book page (each becomes a page), or use "Add to coloring book" on any page you have already made. A book can have up to 12 pages, and each page uses one of your free daily pages.
- 2
Adjust pages. Change the detail level or regenerate any page. Drag pages into the order you want.
- 3
Add a cover. Give the book a title and, if you like, a name ("For Grandma", "Max's first year"), and pick one of your pages as the cover image.
- 4
Preview and download. Check the cover and every page, then download. You get two PDFs, one A4 and one US Letter, so you can print at home or send it to someone abroad.
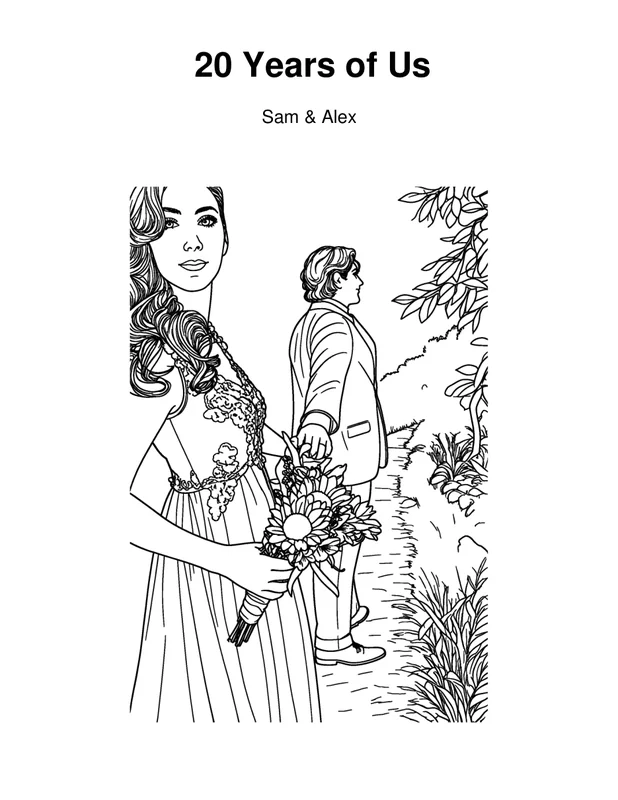
Cover
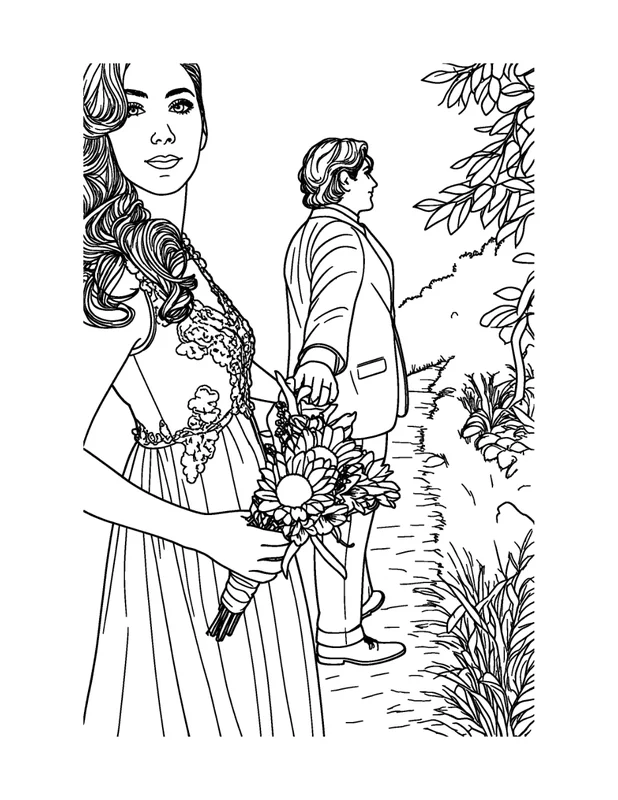
Page 1
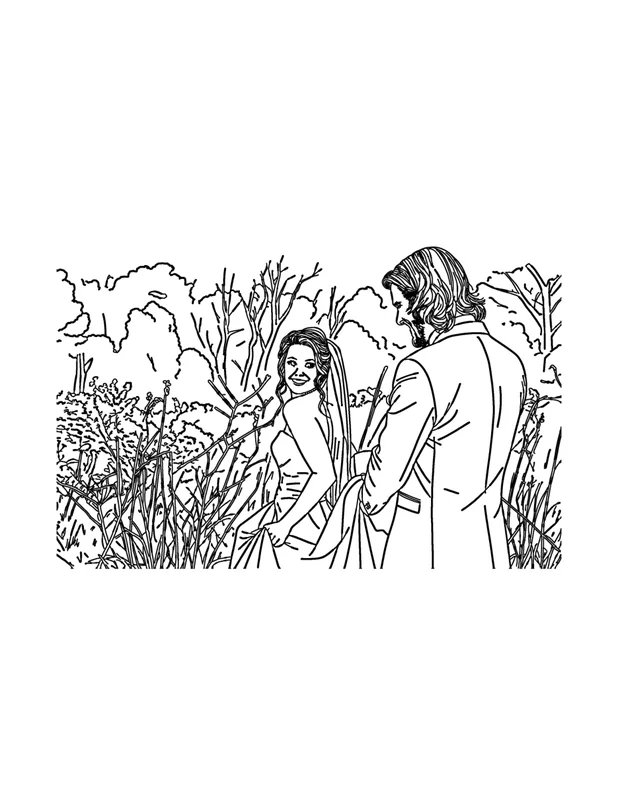
Page 2
Your book draft is saved in the browser you are using, so finish it on the same device. Pages are deleted after 7 days.
The book is a PDF you print yourself. For binding, staple thin books along the left edge, or take the PDF to a local print shop for spiral or comb binding.
Ideas for your pages
- Pets. Dogs, cats, rabbits, horses — see our tips for turning a pet photo into a coloring page, including dark and long-haired pets.
- Family photos and old prints. Holidays, portraits and scanned photos from an old album make great pages for grandparents to color with the grandkids. More in family photo coloring pages.
- Gifts. A book of shared memories for a birthday or a retirement. See personalized coloring book gift ideas.
- Classrooms. Turn photos of a class pet, a field trip spot or classroom objects into pages, following your school's rules on student photos. More in classroom coloring pages from photos.
- Weddings and anniversaries. Use Bold & detailed and pick shots with some contrast. See wedding and anniversary coloring books.
- If you sell on Etsy or publish books. Read our notes on photo coloring pages for Etsy sellers and making a KDP coloring book from photos before you plan anything. Our terms currently cover personal, family, classroom and gift use. Terms for selling haven't been published yet, so read the Terms before you list anything.
The manual alternative: tracing by hand
You don't need AI to make a coloring page. The traditional way still works:
- Print your photo, lightly and a little larger than you need.
- Tape a sheet of plain paper over it on a bright window or a light box.
- Trace the main outlines with a pencil, leaving out shadows and small details.
- Go over the lines with a black fine-liner, erase the pencil, then scan or photocopy.
Tracing gives you full control and a truly hand-made look. The downsides are time and skill: a detailed portrait takes a while, and faces are the hardest part. Many photo editing apps also have an edge-detection or "sketch" filter. It's quick, but usually leaves gray, broken lines that need cleanup before printing.
A middle path: print a generated page and use it as a tracing guide, adding or removing details by hand.
If you'd rather not use AI at all, our image to outline converter traces edges on our own servers without an AI model. The result is closer to a photo trace than a drawing.
What happens to your photo
These photos are personal, so here is what happens. Your photo stays in your browser until you click Generate. Coloring pages are drawn by our AI provider, fal.ai, which processes the photo under its own terms; we send it with fal's request storage turned off. We delete the photo from our storage right after the page is ready (24 hours at most, even if something goes wrong). Pages and coloring book PDFs are deleted after 7 days, or immediately with Delete now. There is no public gallery. Full details are in our privacy policy.
Ready to try?
Pick one well-lit photo, crop it close, choose Standard and see what you get. No account, no watermark, up to 15 free pages a day.
Turn a photo into a coloring page
Frequently asked questions
Is it really free?
Yes. You get up to 15 free AI coloring pages a day, with no watermark and no account. The number left for today is shown under the Generate button, and it resets at midnight UTC.
What kind of photo works best?
A well-lit photo where the main subject fills most of the frame and the background is fairly plain. Crop close before you upload, and make one page per person rather than using a wide group shot.
Which detail level should I choose?
Start with Standard. Use Simple for young children or busy photos, Detailed for older kids and adults, and Bold & detailed for thick lines that keep faces, lace and veils — a good choice for wedding photos and for markers.
What size are the pages?
Each page is a print-ready 300 DPI PNG, or a PDF sized for US Letter (8.5 × 11 in) or A4 (210 × 297 mm). Coloring books come as two PDFs, one in each size.
How many pages can a coloring book have?
Up to 12 pages. Each page uses one of your free daily pages, and you can preview the cover and every page before you download.
What happens to my photo?
It stays in your browser until you click Generate. It is then sent to our AI provider, fal.ai, with its request storage turned off. We delete the photo from our storage right after the page is ready (24 hours at most), and your pages after 7 days or right away with Delete now.